Professional or DIY Sod Installation?
Which method is right for you?
At Western Turf Farms we believe that any homeowner can Do-It-Yourself install a new sod lawn and do it well. As a turfgrass company that’s been in the business of growing high-quality sod products for more than 50 years, we’ve seen our fair share of homeowners attempt DIY sod installations – with variable success.
Ultimately, we believe that any homeowner can DIY install a beautiful new turfgrass sod lawn, but there’s a lot more to laying sod than simply throwing it down. Today we’ll look at some of the key steps to ensuring a beautiful result, and consider the pros and cons of DIY vs hiring a professional to do the job instead.
Preparing Your Site for Sod
Lawn care professionals know that underneath every beautiful lawn is a healthy soil foundation. Alternatively, sites with soils that are compacted or degraded will result in patchy, thin turfgrass. That’s why we advocate site prep for every new sod lawn. Site preparation gives the greatest chance of success and ensures homeowners get the best possible return on their investment.
Remove Debris & Grade for Drainage
A few rocks and bits of brick may not harm a turfgrass lawn, but they can do a world of damage to tool blades or to people if caught and flung by a tiller. Before beginning any sod projects, always be sure to clear the site of debris to prevent accidents!
While clearing away debris, take a moment to examine the existing soil grade of the property. Water runs downhill, so it’s important that the ground gradually slopes away from any building foundations. Homeowners should be looking for something close to a 4% grade away from the house for a fairly level property. This ensures that rainwater deposits safely in the lawn or sewer rather than the basement. It’s not at all uncommon to discover problem spots during this step, so we recommend doing what’s known in the industry as a rough grade before moving on.
Rough grading refers to basic recontouring of a lawn or landscape. This is done by using topsoil or excess dirt to fill in low spots and a shovel or rake to break up and move soil from high points. Homeowners who need to rough grade should aim to get close to their desired lawn slope and contour without worrying about perfection – there’s a lot more work to be done before laying sod!
Loosen Soil & Add Amendments
Healthy soils are complex mixtures of rock, clay, minerals, and organic matter interspersed with pockets of water and air. In residential lawns, soils can become compacted over time making it difficult for turfgrass root systems to expand and killing off the beneficial microorganisms found in healthy soils. It is important to create a healthy, nutrient rich soil foundation that will feed and support the new turfgrass long term before laying new sod.
Pro Tip: Once a rough re-grading has been achieved, till or loosen the soil to alleviate compaction. Loosening the soil will create small pockets of air, allowing for easier root penetration and better water drainage. As an added benefit, it will also help to prevent weeds from coming back too quickly.
At this point, homeowners should closely examine their existing soil composition and consider what soil amendments the site may benefit from. Our staff typically recommends amending any new site with an even layer of 4-6 inches of fresh topsoil. Many homeowners will also opt to include a layer of organic compost for an additional, all-natural nutrient boost.
Builder’s sand is also a smart soil amendment option for any homeowner looking to improve water drainage on their site, but deciding how much to use and where it’s needed most can be a bit tricky. Call us today at 1-888-888-7072 to learn from our knowledgeable staff – we’re happy to help!
Roll & Final Grade
By this point, site preparation is almost complete but there’s still a few important steps that must be done to avoid lawn headaches in the future. Start by rechecking the grade. We often see slight changes after tilling and the addition of several inches of new topsoil or other amendments. This is an ideal time to double check and finesse slopes to create the desired final contour.
Next, use a sod roller to remove the worst of the air pockets created during tilling and to firm up any super loose areas. This should prevent settling and significantly reduce the risk of low spots developing in the new lawn. Spot check the grade and make final adjustments as needed!
Pro Tip: Don’t own a tiller or sod roller? Before rushing out to buy one for the job, check with your local home improvement store to see if they offer a tool rental program. Home Depot is known to offer quite a selection!
After all of the time and effort that goes into creating a nutrient rich soil foundation for the new sod lawn, it’s still important for homeowners to lay down a turf starter fertilizer over the entire site before laying sod. We encourage this because the new sod won’t be able to produce a whole new root system in its new home overnight. Applying a turf starter will provide the lawn with key nutrients to support growth and encourage root development during the establishment period.
Our All Season Builder (18.18.18) fertilizer is one of our favorite products for supporting new sod during establishment. Ask our staff about including it with your sod order!
Pro Tip: Keep soil levels 1/2 – 3/4 an inch lower than surrounding sidewalks or garden borders to accommodate the new sod thickness!
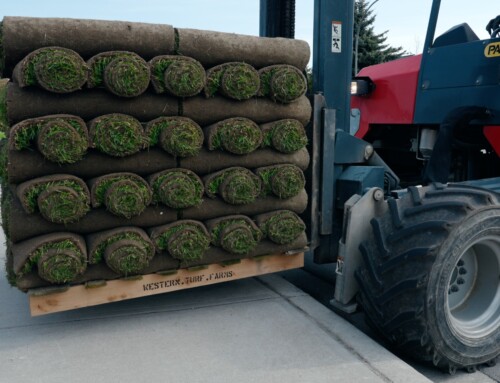
Installing Sod
One of the great things about working with Western Turf Farms to install a new sod lawn is that our products are always farm-fresh and delivered the same day they’re cut. Why? Because we know that time is of the essence. Same-day sod installs have a significantly higher rate of establishment success than installs that are put off by even a day.
Pro Tip: Start by moistening the soil lightly. It will help to prevent the sod roots from drying out during the installation process.
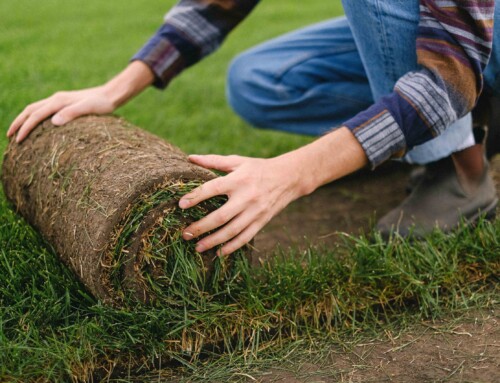
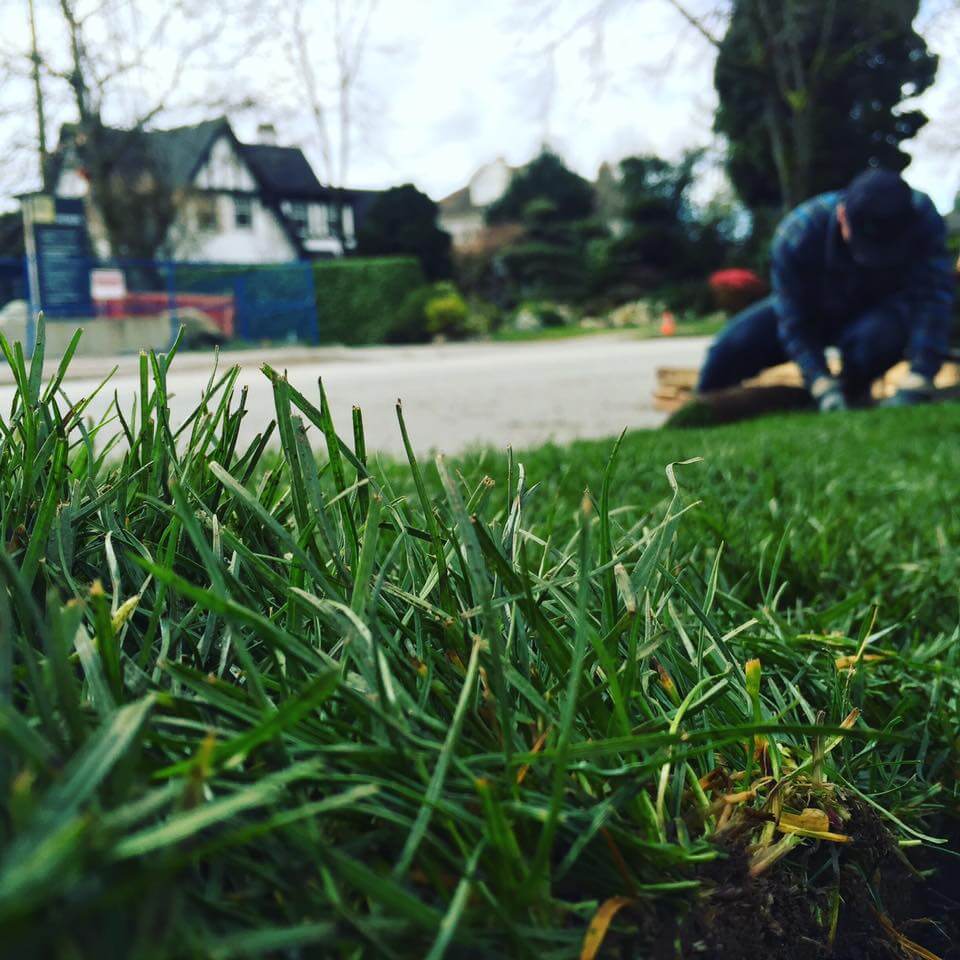
When doing DIY sod installation it’s always a good idea to lay the first pieces along the longest straight line, such as a sidewalk or driveway. This will serve as the guide for the rest of the installation. From there, it’s a bit like building a large puzzle! As each piece is laid, make sure that edges are tightly butted up against the surrounding pieces to prevent gaps or overlaps from forming. At the same time, make a point of staggering joints in each row in a brick-like fashion. Doing so will mean that homeowners need to cut off excess turf pieces from around the edge of the installation (use a sharp knife!) but will significantly reduce the likelihood of visible lines showing after the lawn is installed.
Pro Tip: Concerned about a sloped area? Run the sod across the slope to increase stability. If the slope is particularly steep, consider using sod staples to keep the new lawn in place while it gets established.
Once the last piece of sod is in place, roll the entire area to eliminate any air pockets. This will also ensure good soil to root contact. Afterwards, water immediately and thoroughly because the sod will be thirsty! Aim to provide up to an inch of water on the first day, and as often as necessary for the next 2-4 weeks to prevent the new sod lawn from drying out.
Professional or DIY Sod Installation?
At the end of the day, the decision to hire a professional crew or DIY install a new sod lawn all boils down to personal needs. There is no right or wrong answer, however, there are a few factors to consider when making the decision.
Time
Like most home improvement projects, installing a new sod lawn takes time and the hours involved can add up quickly, especially if the site needs extensive preparation. And unlike with indoor projects (like re-tiling the bathroom) where the work can be spread out if needed, site preparation and sod installation all needs to be done very quickly. Otherwise, the sod may die before it manages to establish.
Physical Labor
No two ways about it: installing a new sod lawn is hard work! Homeowners who choose to DIY should be prepared to move large amounts of soil, contouring and spreading across the entire site, spread fertilizer, and move and lay sod rolls. Even small projects can quickly seem overwhelming without help!
Equipment & Materials
Most of the homeowners don’t have sod rollers, fertilizer spreaders, and tillers hiding in their shed – which isn’t a problem until they’re trying to install sod! As a result, most DIY projects have the added step of tracking down or purchasing the equipment necessary to do the work.
Cost
The number one reason homeowners tell us they’d like to DIY is to cut the cost of installing a new sod lawn. It’s a stance we can wholeheartedly respect but we encourage homeowners to have all the facts first before committing to DIY. Why? Because sod lawns are a valuable investment both in terms of upfront cost and long-term aesthetic and physical property value. We want to ensure that every client gets the best results from their new sod lawn.
Although DIY can cut the upfront costs of professional labor from the budget, it also results in tool rental fees. Not to mention the extra time spent sourcing materials, tools, and installing the new lawn. Homeowners need to consider what their time is worth when thinking about the bottom line of a project. Another factor to take into account is that professional crews often offer a warranty or guarantee on their work, meaning they’ll come back and fix any problems that arise free of charge within a certain amount of time. Homeowners that DIY lose that extra security.
Benefits of Hiring a Professional Crew
Professional crews tend to be well-trained units, quickly moving through each step of a job with practiced efficiency. When install day rolls around professional crews can be expected to arrive on site with all of the necessary equipment and materials, ready to go. The end result? A beautiful, healthy lawn installed in almost no time at all – and often under warranty. It’s hard to beat that!
Call us today at 1-888-888-7072 to learn more about sod installation options for homeowners!
The Takeaway
Anyone can install a new sod lawn, but establishing a beautiful lawn requires proper site preparation and installation methods. Consider options carefully before committing to DIY – choose the installation method that best protects your investment!